The Val Ease Central Railroad ©
Taking Z Scale to the Public Around the World
(Text and photos © Copyright Jeffrey MacHan)
Howard Kannitbee, P.E., Superintendant of Engineering, VECRR
Construction Diary - Opening "Val Ease Summit"
VES Construction, part 6: A "magnetic mountain" and lakeside tales
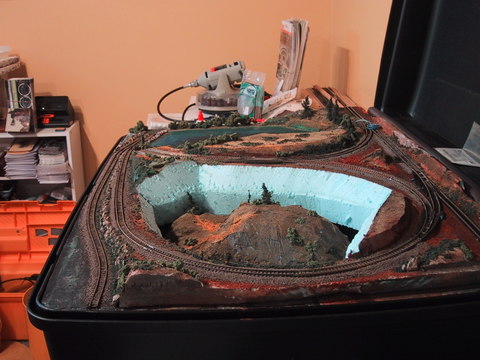
Here's Summit Mountain looking up through the opening in the base taken from another angle.
I was fortunate to have already on hand a couple of packages of magnetic strips. Little did I know when I bought them that they would be put to use keeping a mountain firmly positioned inside a hole!
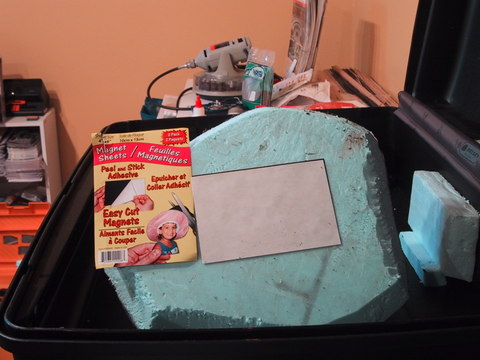
As you can see, I have attached one sheet to the mountain bottom and the second sheet with it's wax paper protector over the sticky side is magnetically locked to its mate.
Each package of magnetic sheets comes with two sheets which are perfect matches when placed back to back. Attaching them to the mountain is simply a matter of peeling off the non-stick backing from the adhesive on the sheet and firmly applying the sheet to the base. It is important to remove any dust and stray bits of foam from the surface so that the sheet lies flat and the glue adheres properly.
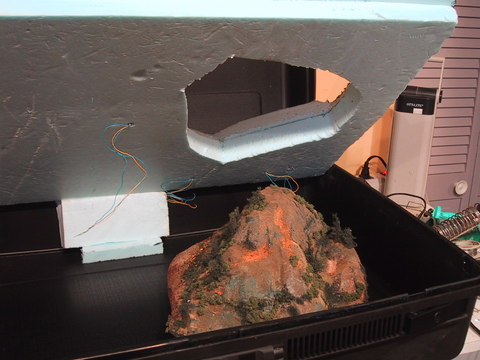
The mountain is now positioned so that the base does not interfere with any trees etc. when it is lowered over the mountain.
Before removing the protective sheet from the magnetic sheet still stuck to the underside of the mountian I carefully positioned Summit Mountain so that the base would not touch it when lowered into position. I then removed the base and stored it off to the side. Then I placed a couple of small bottles or other objects along side the mountain to mark its position inside the case. I then lifted the mountain up, removed the non-stick sheet and returned the mountain to its marked position. I did not apply pressure to fix the adhesive just yet. I once again placed the base over the mountain to double check the positioning and then pressed down to make the bond between the magnetic sheet and the suitcase. I left Summit Mountain in place in the bottom of the suitcase overnight to let the glue set permanently.
In the meantime, I did some wiring housekeeping since I had several turnouts that had wires in the way. Here's my VECRR techique for wire management.
|
Use a straw to run turnout wires through styrofoam
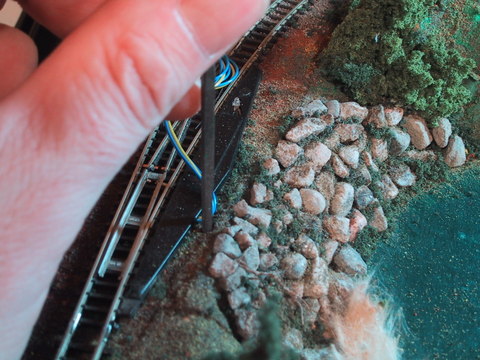
Jeffrey MacHan How to push wires through styrofoam I thought I'd pass along a little trick that I came up with to quickly and easily thread wires through styrofoam up to 4 inches thick. The following photos illustrate the technique with turnout wires.
 The first tool used to make the pilot hole is a long, thin skewer. I used a bamboo skewer but anything with a sharp point and solid enough to not bend while being pushed through the foam will do. Notice I start the hole right next to the place the wires exit the Big Black Box (BBB).
 When the pilot hole is done I widen the hole using a round jewelers file. It's easier to make a pilot hole than to try to push the file through the foam first.
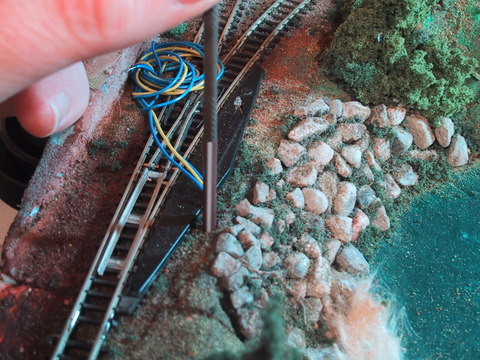 Then I place a cocktail straw (small diameter) over the end of the file, not the tip, and guide the straw into the hole using the file to keep the straw from bending. Once the straw is fully inserted I cut it flush on the underside of the foam base using a pair of Xuron Railnippers. I now have a nice smooth hole through which to thread the wires.
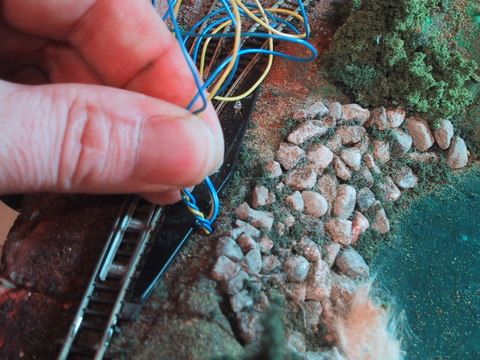 Next step is to twist the three wires together and slowly thread them down the hole. The straw prevents the wires from catching on the foam and they slide easily.
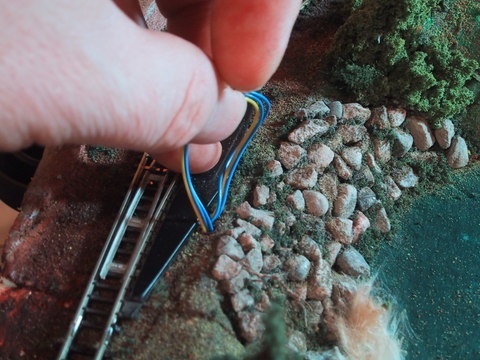 The last step is to gently pull the wires from the underside of the base so that they do not form a knot or bunch up. By pulling on separate wires I was able to make a nice neat bend from the BBB into the guide hole. A little ground foam will hide the coloured wires when I camouflage the BBBs.
|
Summit Lake comes to life!
It's finally time to get to work adding some exciting scenery elements around Summit Lake and to begin to "apply" acrylic gloss medium "water".
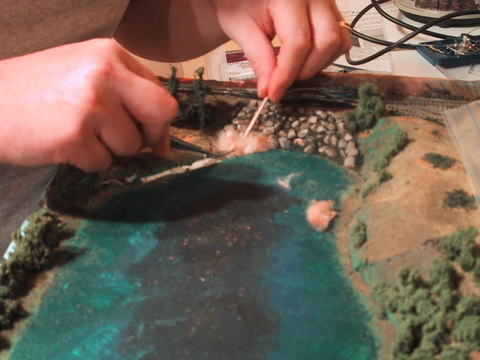
Using real bullrush seeds I placed rushes where the lake bottom would be shallow.
The first thing I did to prepare the lake shoreline was to glue real bullrush seeds that I had collected on a field trip many years ago. The rush seeds are safely stored in a resealable plastic bag for projects just like VES. One bullrush head has enough seeds for a lifetime of model railroading. It's important to pick a ripe bullrush head when the seeds are mature and ready to disperse.
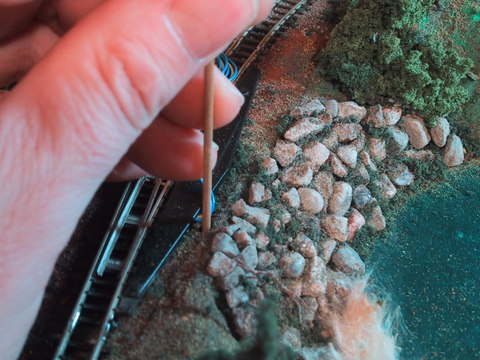
The tools I use are very basic, a small bottle of tacky acrylic glue, a pair of bent-nose hobby tweezers and a cocktail toothpick or some other pointy object to help fluff the bullrushes.
Step 1: apply a bead of glue where the rushes will be applied. It is possible to cover a larger area with glue than just one strip but I like to see how the rushes look before adding another section.
I then pick up a nice-looking bunch of rush seeds in the tweezers. I usually even out the rushes by pinching off the longer seed fibres above and below the tweezer jaws. I then gently apply the seeds to the glue and open up the tweezers. The seeds adhere very strongly to the glue. I then continue to apply seeds along the bead of glue until I've covered the area. You can clearly see in my fuzzy photo where the glue follows the shoreline of the lake. It is easy to apply another bead of glue where needed.
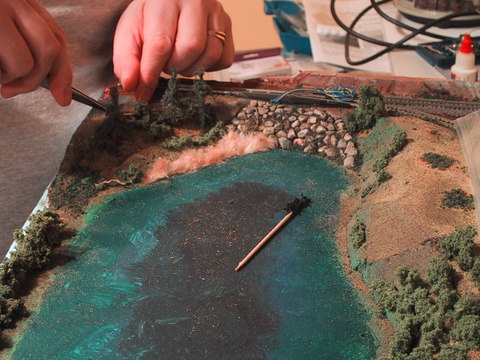
Using a pair of bent-nosed tweezers I picked up left over foliage and filled in crevasses and ravines along the lake shore.
While deciding whether or not to continue with my bullrush planting, I use the same tweezers to dip into my container of foliage droppings left over from fir tree making. I never waste any scenery materials. The foliage makes great low ground cover. Several shades are available but I only had conifer green at the time this photo was taken. I have since picked up the following supplies to complete work on VES:
- Woodland Scenics Foliage, Medium Green #F52 (for another crop of fir
trees)
- Woodland Scenics Foliage, Conifer Green #F54 (for another crop of
fir trees)
- Woodland Scenics Foliage Clusters, Dark Green #FC59 (a little darker
green than the package I've been using so far. This will help to add
a little more colour to the shrubbery and bushes. I'll also use it to
do some groundskeeping on the other three divisions of the VEC).
Let's make a lake!
Before I cracked open the jar of gloss medium gel, I prepared the lake banks and repainted the base. There is a deep and a shallow side to the lake as can be seen from the photo. I did some retouching to darken the base along the deep (right-hand side) of the lake. The bullrush planting was done along the shallow (left-hand side) of the lake and along the front against the riprap barrier.
As I go along and to keep busy, I've added bushes and dead branches here and there to "fix" defects in the rock carving. I've spotted a good number of places where I'll likely "plant" fir trees when I get back to assembling them.
The first coat of "dilute" gel was applied with my 1" paint brush as a wash (couple of teaspoons of gel in a quarter cup of water and thoroughly mixed). The wash had the consistency of a watery custard. I covered the lake bed, teasing the wash up to the riprap and under the bullrushes. I do plan to add more undergrowth and bullrushes as I fill in the "water" so this was just the beginning of the process. The first coat dried pretty quickly, a couple of hours. I was careful to burst any bubbles left in the surface from my gel wash application by blowing on them.
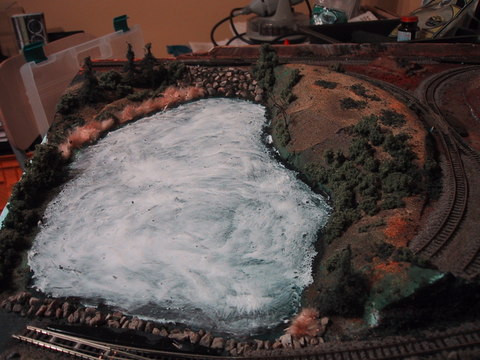
The gloss medium gel looks like ice has formed on the lake. I've softened any brush marks using a light water wash.
Next I brushed on a coat of gel directly from the jar covering the entire surface of the lake. I used a 1/2" oil paint brush to scoop the gel and slap it onto the lake. Then I smoothed the gel out making sure that the entire surface had a nice "white" coating of gel. As you can imagine there were lots of brush marks on this coat, something I did not want to have become permanent once the gel had set.
I lightly brushed the entire surface of slowly setting gel with my wet-with-water 1" paint brush. I dipped the brush into some clean water and very lightly washed away the brush marks on the surface of the gel.
Modelling tip: If I had found my little plastic spatula I might have been tempted to apply a thicker coat but as it turned out, thinner is better at the beginning. Thin coats dry in a couple of hours which is more satisfying than waiting overnight for a thick coat to dry.