The Val Ease Central Railroad ©
Taking Z Scale to the Public Around the World
(Text and photos © Copyright Jeffrey MacHan)
Howard Kannitbee, P.E., Superintendant of Engineering, VECRR
Construction Diary - Opening "Val Ease Summit"
VES Construction, part 4: VES takes shape and colours come to life
Getting rid of the "blues".
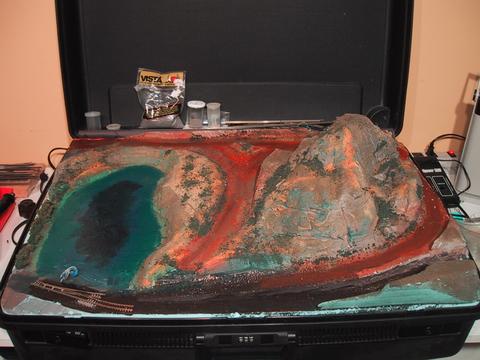
The cutter has been put aside for now and the acrylic paints and my trusty 1.5" paintbrush were called out of retirement. I dabbed the base colours directly onto the foam and used the wetted brush to go to work on the foam.
My roadbed colour is burnt umber or dark brown. The rocks were a combination of grey and dark brown with dashes of light brown for effect. Black was used sparingly as a highlight wash. The lake edge is light green, then a band of dark green followed by the centre mixture of black and dark blue. This is not likely to be the final colour treatment for the lake. I'm still working on what to do with this piece of real estate.
|
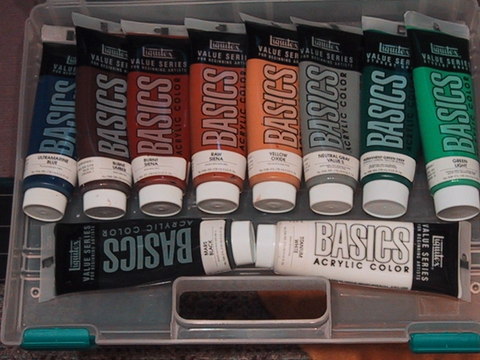 The ten "BASIC" acrylic colours used on everything VECRR including the hand-painted backdrops.
|
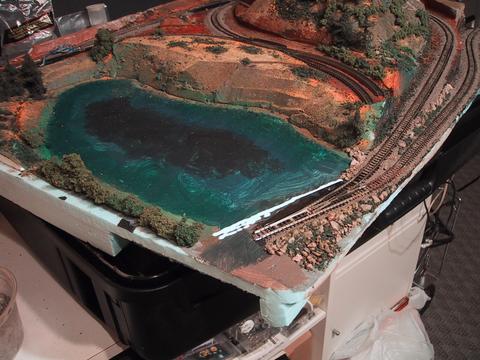
The lake springs into being.
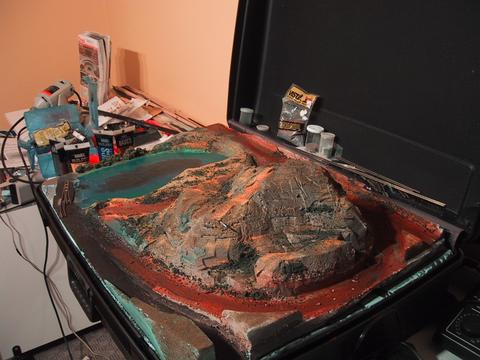
It's amazing what a bit of colour can do to bring life to a scene. Even with only a couple of dashes of foliage ground cover the mountain looks like it might "amount" to something after all.
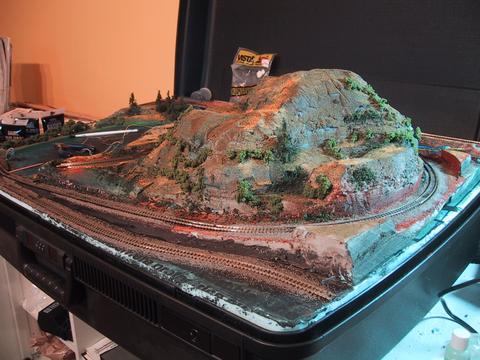
The first tree is planted on VES and there are tracks, too!
Yes! It's ALIVE! The time had come to plant a tree even if it was only symbolic at this point. Funny how I began to see something special taking shape in front of me.
You can see that there has been quite a bit of work done on the tracklaying side of things. Most of the track is in place, held by heavy metal T-pins. Before ballasting I soldered all of the joints between track sections. I used Peco joiners to attach the Peco flex sections to the Märklin set track pieces. I don't like Peco joiners but I didn't want to waste the Micro-Trains Line joiners in my toobox. Besides the joiners were there to hold the track in position for soldering. In order to get the joiners to slide on to the rail end, I had to file the rails to remove any burrs after cutting with a Xuron Railnipper tool. I opened the joiners oh so slightly using a small jewellers screwdriver and then press them onto the rail with my fingers. Every once and a while I tapped on the end of the joiner with the flat side of my wire cutters. This pushed the joiner further onto the rail but also ended up bending down the very flexible metal of the joiner itself. There's always a price to pay for shortcuts in Z!
I used Woodland Scenics fine grey ballast for VES. I applied it from a plastic 35mm film canister. I first filled the centre of the track between the rails covering the ties with ballast. Then I ran a bead of ballast along both sides of the track also covering the tops of the ties. Then using a very soft water colour brush I gently dusted the ballast along the length of the track, pushing excess ballast over the rails. Just the outside bristles of the brush were used to shape the ballast on the tie ends. This resulted in a natural slope to the ballast bed along the track.
I glued the ballast using my tried and true method. Using a fine, needle tipped dispenser I applied 70% isopropyl alcohol (rubbing alcohol) first between the rails along a 4 inch section, then along the outsides of the rails making sure that the alcohol had penetrated the ballast. This method prevents balling up of the glue mixture and also speeds drying.
My glue is a 1-part tacky acrylic glue to 3-parts water mixed thoroughly in a small squeezable applicator bottle that I recycled from an ink jet printer ink refill kit. These bottles are tremendous and you also get to fill up your ink jet cartridges. I apply the glue in drops every second tie along the alcohol-wet section then along the outsides making sure that the glue has penetrated the ballast completely. How do I know? The white glue can be seen on the surface of the ballast. Anyway, you'll know, too. Don't overdo the application. When dry, the ballast will be solid.
Riprap is a grand thing!
I've wanted to do a riprap scene on my VEC for the last 14 years. There just wasn't any place to do this on the first three sections. VES has given me my chance and I took full advantage of it.
Since my generous application of dilute white glue would take all night to dry, I moved on to the suitcase itself and removed the locking hardware. The holes left over from the two screws I removed will be the openings for the post screws to attach the removable overhead halogen light. For the last three months or more, the suitcase has been slowly flattened by the four bricks that I placed along the inside to help bring the layout base down to the same height as Centre Val Ease. The other sections of VEC have all flattened over time with the weight of the tranformers and other hardware stored inside. The brand new Delsey hardside suitcase needed to be broken in.
Although I have electric switches installed in VES I don't plan on adding a control box. Any switching that may take place, if ever, will be manual. VES won't be equiped with an RS232 connector or 120v socket. I have to keep reminding myself that VES is designed to take the place of VEE when that module goes on the road.
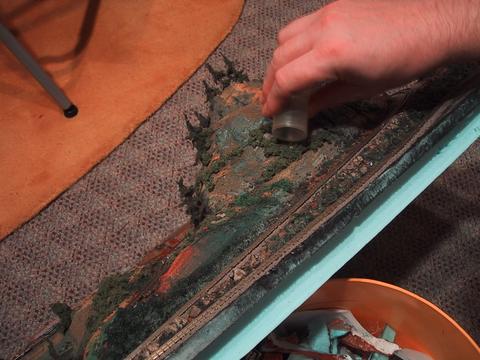
Applying ground foam (dark green foliage left overs) on the hillside to "hide" defects.
At this point my retaining walls are taking shape and the weeds and grass cover has been applied with the base tipped at an angle. I took advantage of this new vantage point and touched up various defects that I couldn't see from my standing position over the layout when it was on my work surface. It is so easy to apply ground cover and other scenery materials with the base at the right angle.