The Val Ease Central Railroad ©
Taking Z Scale to the Public Around the World
(Text and photos © Copyright Jeffrey MacHan)
Howard Kannitbee, P.E., Superintendant of Engineering, VECRR
Construction Diary - Opening "Val Ease Summit"
VES Construction, part 3: Track laying and landscaping
Time was running short before CVE would head back to the Museum.
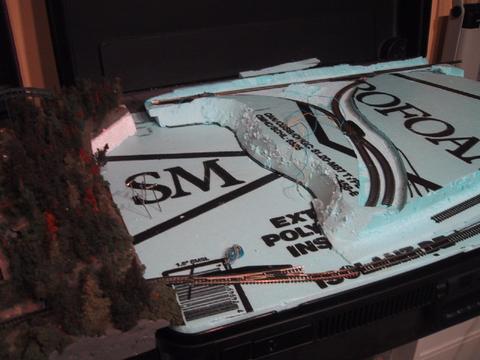
The first bit of tracklaying was placing the left-hand switch at the joint with CVE. This would be the anchor point for the front edge.
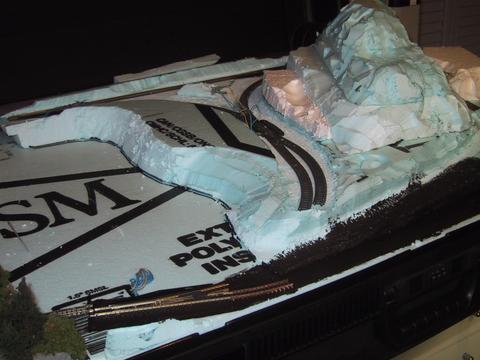
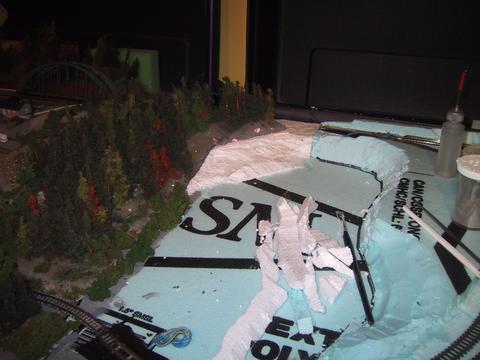
Some black paint to go with your blue foam?
Now that the roadbed and grades had been finished, it was time to put down a coat of black acrylic paint to seal and hide the foam. You can see that Summit Mountain is starting to take a more rounded if not yet refined shape. Paint a little, carve a little...that's my motto!
|
Tips on Using the Tippi Hot Wire Foam Cutter, Part 2
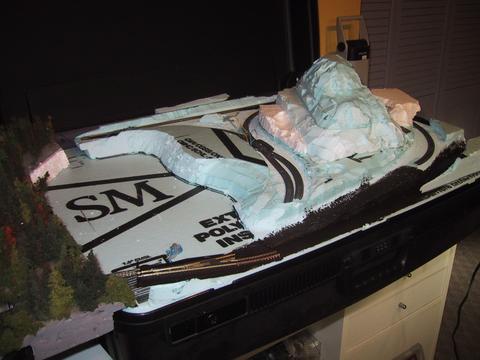
Jeffrey MacHan Making a mountain out of a mole hill Shaping a hillside or even worse, sculpting a mountain from a stack of rough styrofoam scraps is more an art than a technique. I'll try to explain some of the things I kept in mind as I "perfected the look" of Summit Mountain. You might have noticed that Summit Mountain started out as a stack of three rather irregular pieces of scrap 1.5" blue styrofoam insulation board. I would have liked to have had some larger pieces but they "worked" in the rather limited space available. The smallest piece was on top of the pile and the largest piece made up the base. I found a couple of extra scraps of white packing foam to fill in some obvious gaps in the base which I figured should start out as a full block in which to play with the Tippi cutter. The first thing I did was to pin the sections together, not glue them. I wasn't entirely sure at the beginning how I would solve the suitcase closing problem. The next thing was to use the Tippi outfitted with the large square blade to round off the edges of the top sections of the mountain. This rounding off helped me discover where it would be interesting to have some depressions and other irregular rock formations. Summit Mountain was not a jagged peak but a somewhat worn and proud remnant of the last glacial activity that channeled the valley below. I knew that I would be able to use ground foam and foliage leftovers to hide blemishes and to give some character to the mountainside. One area of concern was the back side of the mountain. After a very long period of reflection about a believable industry to inhabit VES, I decided that a quarry would make perfect sense. The cut stone would naturally be shipped out on flats and gondolas that would make use of the second wye lead. The quarry would allow me to cut steps into the side of Summit Mountain facing the mainline and the wye. That meant that I would really have to concentrate on three sides when it came to producing a "natural" look to the rock. Useful tip: avoid shaping the mountain so that it looks too symmetrical. Plateaus, ledges, cuts and ravines make great areas to plant trees, fill with rock falls and dead branches. I wanted to show a good deal of rock on Summit Mountain. It would have been easy to simply cover most of it with trees and foliage clumps. That may have looked great but I wanted to highlight the Mountain as a huge piece of granite, something that wasn't easily tamed by the engineers and labourers of the VECRR. So, the time had finally come to prepare the surface of the foam before painting. The Tippi tool made short work of flattening little outcrops of rough foam that needed attention. I just ran the hot wire lightly over the spot to be melted until it flattened. It was also easy to form gullies and ravines using the same tip and letting it sink a bit into the foam. I went over most of the rock surface with the tip, adding some "character" to otherwise plain and flat rock faces. The hardened surface also made it easier to cut cracks and striations using the point of a sharp hobby knife blade. To be honest, once I got going with the Tippi on shaping the mountain, it didn't take me long to reach my "that's good enough" milestone. Being impatient by nature (a terribly painful condition for a Z-scaler!) I decided it was time to apply some rich acrylic colours to the foam. The acrylic paint would seal the foam and help hold ground cover dustings and future applications of full-strength or diluted glue. It is important to point out that I always assume that I will make changes after the paint has dried and I've done some scenicking. Adding colour and texture helps to stimulate my imagination and I "see" where improvements, well at least to my eye, can be made. An "improvement" more often than not means eliminating glaring defects that sometimes can only be seen when the mountain is picked up and rotated. Then comes the truly fun part of scenicking for me. For some strange reason, I enjoy adding trees one at a time and building up the landscape to the point where I'm happy with the overall effect. It's amazing, even to me, how I can hover over the scene with a tree in my fingers until I find that perfect spot. The really funny thing is, I do that with every tree! The moral of the story is to have fun with the process. The finished scene is never really finished, at least not in my book. I like to think that my artificial landscape is "alive" in my mind's eye and will continue to slowly evolve.
My last word on sculpting is to allow yourself the freedom to take a break and let the scene breathe for however long it takes for inspiration to come along, if ever, and to enjoy the moment. Also, if you're not comfortable attacking a molehill with your Tippi, try your hand on some scraps. After all, Howard Kannitbee... |
There WILL be a lake there!
The contours of the lake are pretty much roughed out. At this point I had only a vague idea of the look I'd like to achieve with the lake. Lot's of time to worry about that later. Lot's to do on the mountain!
The left hand joint is slowly coming into focus.
I had run out of scrap blue styrofoam at this point so I went to my backup supply of white foam. It is the crumbly soft kind but it has the advantage of being very easily cut with the hot wire cutter. I figured that I could hide any big mistakes with ground foam and trees later on. At this point it was important to have a continuous slope from CVE to the lake bed.
Making progress after all. The cutter makes short work of the white styrofoam.
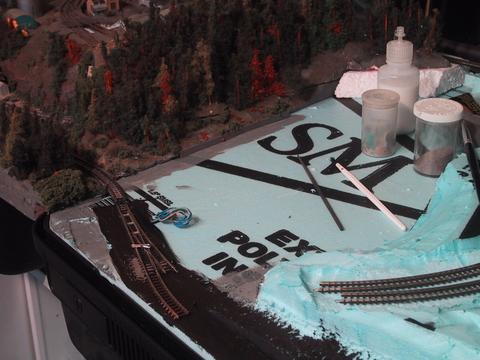
Shortly following the time this photo was taken the VEC left my home for the last time. Immediately following the Exporail Summer Train Show in August 2004 the VEC took up residence permanently at the Museum. Work from here on would have to be done on VES alone. There would now be a lot more room on the work surface and I could spread my tools all over!