The Val Ease Central Railroad ©
Taking Z Scale to the Public Around the World
(Text and photos © Copyright Jeffrey MacHan)
Howard Kannitbee, P.E., Superintendant of Engineering, VECRR
Construction Diary - Opening "Val Ease Summit"
VES Construction, part 2: The BIG Cut - making a road where none existed
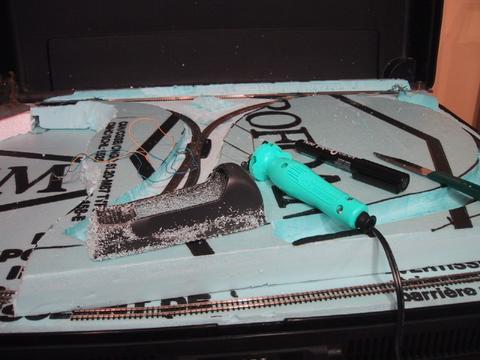
Hot wire foam cutter and a rasp make cutting easy and messy!
Before cutting begins, I used large steel pins to temporarily attach the styrofoam sheets together. After marking the outside edges of the track components on the styrofoam I began the cautious process of cutting out the areas where the track would be positioned. The upper section of track was actually about 1/2 inch below the height of the second layer of foam. This meant quite a bit of cutting. I used the wide, square cutting wire on the cutter to be able to cut large slivers of foam. It was slow going but the cut surface was hardened by the heat from the cutter which helped when it came time to use the rasp. The hand rasp worked like a charm. I was able to smooth and shape using this tool.
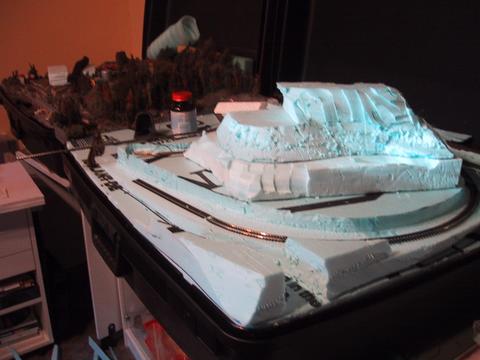
The rough curve was cut using the hot wire cutter and the final grade was shaped using the rasp.
This photo clearly shows the job done using my two main tools to shape the styrofoam at this stage of construction. What you don't see is the pile of foam strips I have cut from the second layer of blue styrofoam. The cuts are very basic at this point. I am still working on "discovering" the shape of the mountain. I'm not concerned about the details at this point. The important job is to shave down the roadbed to make a gentle grade and a flat roadbed in the wye and along the mainline.
|
Tips on Using the Tippi Hot Wire Foam Cutter, Part 1
Jeffrey MacHan The Tippi Foam Cutter is a wonderful tool. Where was it when I started the VEC in 1992? Better late than never, I've heard. The Cutter comes with a selection of wire shapes that are useful, I assume, for a variety of cutting jobs. For the VES I only used one blade, the big, square-shaped form. That's not to say that the other tips aren't very handy. The narrow blade can be used to make knifelike cuts and gouges. The round tip makes short work of scooping out material for a lake or other rounded depression. The Tippi comes with a wall transformer and is held in one hand with the thumb or forefinger depending how you hold the handle on a little trigger. Holding down the trigger supplies power to the wire which heats up quite quickly. The blade works best when very hot so I let it heat up before attacking my foam target. I also tend to hold the trigger down to keep the blade hot while I'm in the middle of a large carving exercise. Carving techniques Cutting a roadbed and shaping a mountain require two skill sets. Let's talk about the easy task first. Cutting a right of way As can be seen in the photos of the early stages of roadbed cutting, the track sections were placed on the foam and I traced the outline for the width of the cut leaving about 3/4" clearance on each side of the track. The total width of the trench to be cut was about 2". I began the cut by holding the tool so that the wire would cut a vertical side to the trench. Note: it would be easy to form sloping walls later when I actually knew what I wanted to achieve. I did not attempt to cut more than 1/2" in depth. There is a lot of resistance to pulling the Tippi cutter through the dense blue foam whereas it flies trough white foam packing like a hot cutter through butter. The wire had a tendency to twist in the cutter posts. I needed to tighten the locking screws on occasion to keep the wire in place. I usually cut strips that were about a foot long (the point when my hand would get sore and I had to stop to relax my grip a bit. There's always a practical reason)! Useful tip: the secret to a straight cut is to use the right "blade" or cutter tip and to use a firm, slow (keeping the tip hot) and even cutting motion. Useful tip: rather than picking the fine "whiskers" or "strands" or "strings "that the cutting process leaves when you remove the cut section, use the hot tip to quickly melt the pesky filaments. My personal favourite method was to simply rub my hand over the foam surface to break off the whiskers and then vacuum them up from the floor when cleaning up my mess. I removed rough strips all along the marked right-of-way then I began a second cutting session where I tried to remove foam as close to the final grade as possible without going too deep. Useful tip: to cut to a specified depth, measure the maximum depth and transfer that measurement to the cutting tip. I simply used a felt-tip marker to place a dot on both wires as a depth guide. The final removal of material to make a smooth grade was done using the small hand rasp. The nice thing about using the Tippi was that the surface of the foam had melted slightly and hardened which made using the rasp easier. True, I swear! Useful tip: the Tippi does not do a good job of removing fine slivers of material. The foam tends to melt and stick to the hot wire. See the second part of this sidebar for sculpting tips. Once the grade was even along its whole length, I took the Tippi and used one corner of the square wire to remove a very small sliver of foam along the outside edges of the trench to make rough drainage ditches. The ditch between the track and Summit Mountain would be filled with weeds, bullrushes and other undergrowth that would help hide the separation joint of the removable mountain section. Useful tip: its easier to remove extra material later than to have to add filler. I tend to be conservative and take small pieces of terrain rather than large chunks that I might regret later.
|
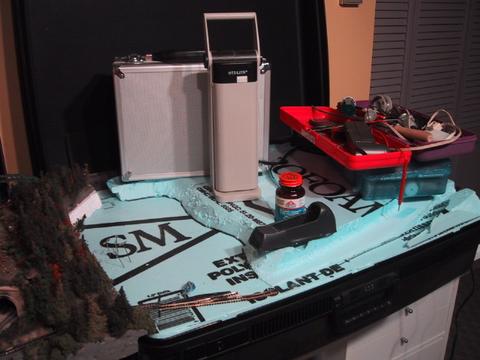
Time to glue things together.
Now that the rough outline of the lake and the track roadbed has been done it was time to glue the two styrofoam sheets together. Not being completely convinced of the final outcome, I used rubber cement at this stage. If I had to separate the layers later the rubber cement would allow me to do so without destroying anything.
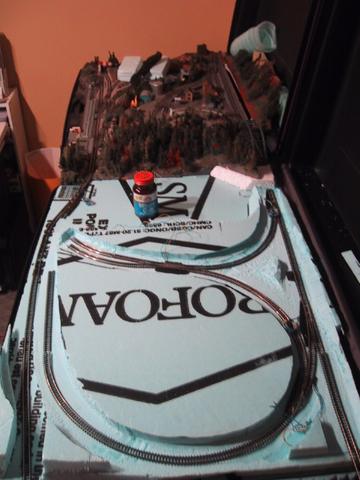
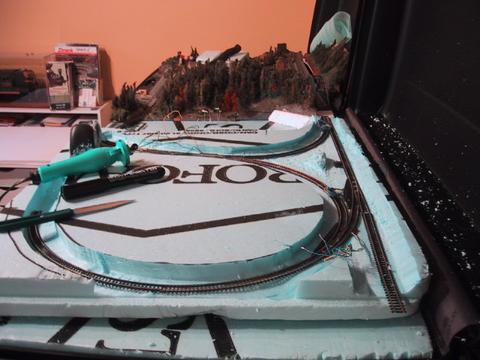
Here you have it, folks...the final final VES track plan.
Time to start building a mountain!
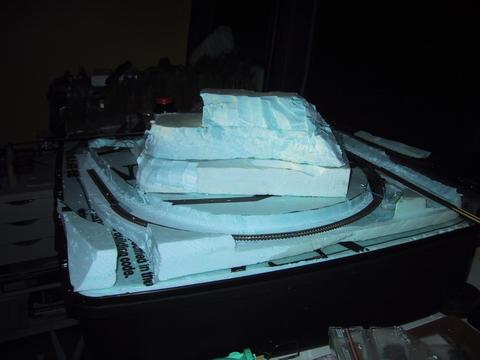
Being the miserly sort, I began construction of Summit Mountain using pieces of scrap styrofoam. Yes, I know that it doesn't look like much but it is kinda cute, don't you think?
Using the hot wire cutter, I started to take some of the rough edges off Summit Mountain.
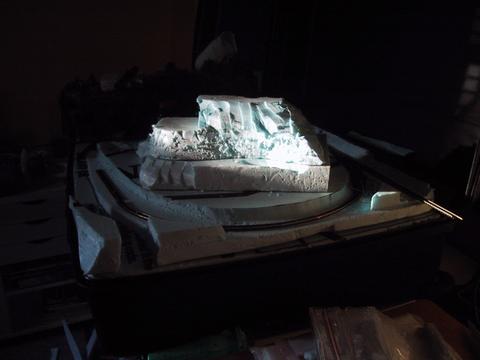
Maybe seeing the mountain in a different light would give me some inspiration!
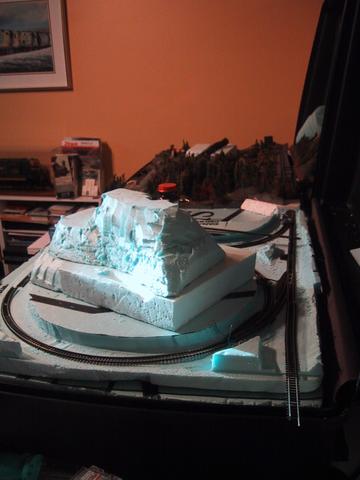
Nope! The pile of styrofoam is still there.
Still no inspiration. Maybe it's time to take a break. I didn't go back to this task for three months. Besides it was garden railroad weather!