The Val Ease Central Railroad ©
Taking Z Scale to the Public Around the World
(Text and photos © Copyright Jeffrey MacHan)
Last Spike: Building "Val Ease Summit" or You can't get there from here!
Almost 3 years after finishing Centre Val Ease a fourth module, "Val Ease Summit", is taking shape. The idea of "VES" came about as did "CVE", a suggestion from persons who shall remain nameless. I was told in no uncertain terms that the "VEC" needed another section. The reason always seemed to be, More is better! That may be true with Z trains in general but I had "one" problem with adding a fourth suitcase to the layout, namely "who, what, when, where, how"!
Problem was, I liked the idea. It got the creative juices going. I started looking at different track plans that would add operational interest to the layout as a whole. "VES" was beginning to take shape in my mind's eye. The unfortunate thing about the mind's eye, is that it does not measure things very well. But it certainly has boundless imaginary possibilities.
In order to take full advantage of the collected wisdom of the members of the VECRR yahoogroup, I asked for suggestions on track plans and positioning of the fourth module. The discussion was stimulating and "we" eventually arrived at a plan flexible enough to set up the layout in a straight line or in an "L" shape with "VES" either to the Left or to the Right of "CVE". The plan is shown below.
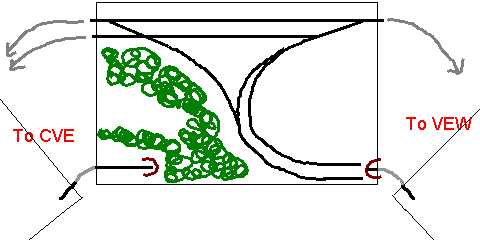
The final? VES track plan
Things seemed to be going smoothly until I got ambitious one evening and started to position the suitcases to begin to take measurements. It didn't take long to realize that the "L" shape required a huge amount of real estate and would make set-up a nightmare. The straight line option was out since my newly acquired home did not have a 12 foot long wall, at least not within the confines of the train room. This seemed like a dead end. I announced to my fellow Valeasians that "VES" was not to be. Months passed...
Then one day the Toronto National Train Show started to come into view and I began playing with ideas to add something different to entertain the visitors. A telephone call to Terry Sutfin to discuss NTS and other major projects eventually came around to the subject of "VES". I explained that setting up a 12-foot long monster would take too long and probably be plagued by operational gremlins. Terry had a suggestion. Why not make "VES" interchangeable with "CVE"? That way the layout would remain manageable and I wouldn't have to paint any new backgrounds. Brilliant!
The "VEC" is a show layout after all. What better way to add variety than to switch between two different modules on alternate days of a train show? Switching scenic elements is a time-honored technique in model railroading so why not switch entire layouts sections? Could this be the beginning of the "VEC" modular system? Time to get back to the workbench.
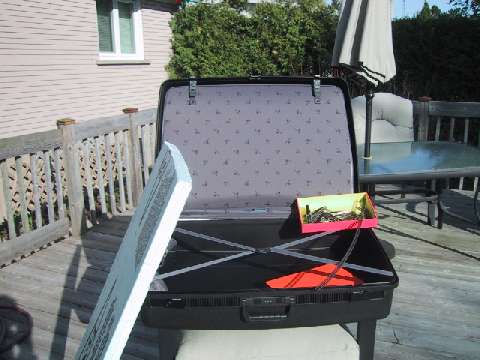
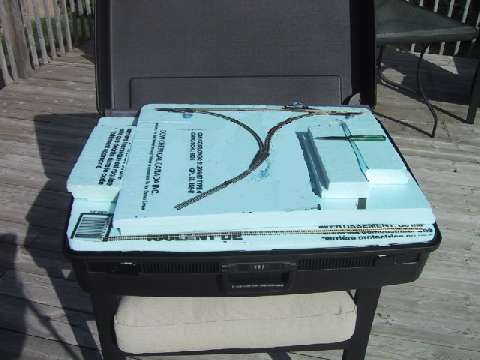
Delsey suitcase, styrofoam, track and sunshine
Suitcase all set and ready to make an impression
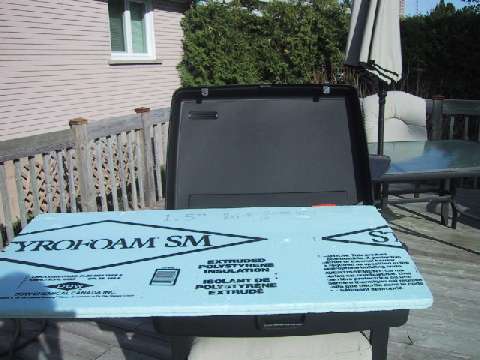
The outline makes cutting the base easy. A little trimming and it will drop into place.
Cutting styrofoam is easy either with a sharp carving knife or with a hot foam cutter. It only took me about 10 minutes to cut the base to shape and get it to fit snuggly inside the suitcase. Now it was time to start laying out the track to test for clearances and workability. I love playing with snap track pieces. It must be a throwback to my childhood set of blocks. It is usually at this stage that my imagination takes a huge hit from cold hard reality. My track plan just wouldn't fit inside the physical limits of the case. Fortunately for the future of the project, it was time for lunch and a pep talk from my wife, Marthe. She reminded me that she had no doubt that I would find a way to make it fit. I always had, she said.
Now I was in trouble, my wife expected me to finish "VES". There was no elegant, face-saving way out of this dilemma. Only one thing left to do...compromise! Yes, dear friends, compromise. In fact, if you look up the word "compromise" in the dictionary, you'll read the following definition: Act of building a model railroad! And this is really the theme of the tale of "Val Ease Summit" and of the Val Ease Central or any layout for that matter. We use forced perspective, selective compression, fast clocks and completely unrealistic track plans in impossible spaces. In order to satisfy our desire to see our miniature railroads come to life, we suspend our disbelief, we accept to "see" a completely different reality once we step into our miniature world.
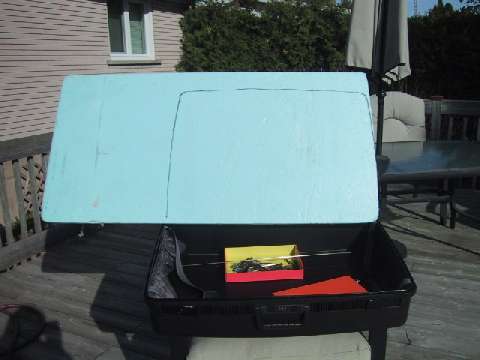
I went back out to the waiting case and styrofoam. The track had not miraculously rearranged itself nor had the suitcase grown by two inches! It was up to me to find a way to make it work. My double mainline was grudgingly abandoned in favor of a simple wye with an industrial lead on the upper level. Below a single mainline track would pass through at least one tunnel or maybe even a snow shed!
The track is positioned for clearance and tweaking purposes!
Stay tuned for the next installment of "Building Val Ease Summit" when I get to glue, carve, paint, ballast, plant trees, create clearings, dump riprap, pour acrylic water and build mountains...