The Val Ease Central Railroad ©
Taking Z Scale to the Public Around the World
(Text and photos © Copyright Jeffrey MacHan)
Night Time is Fun time on the VECRR
That's what my 5-year-old self remembers of my earliest encounter with a Lionel O-27 gauge train running with the room lights turned off. The dozens of Xmas lights in the tree certainly added to the impact of the moment...a fond memory if ever there was one! I spent hours on my tummy squinting along the track as the train raced around the small oval, over and over again.
I am still enthralled by the magic of the nighttime spectacle of an illuminated model railroad. Then it should not come as a suprise to learn that the “Val Ease Central Railroad” comes to life once the “sun” goes down.
A tale of “Beauty” and the “Beast” - installing Märklin's true-to-scale industrial lights
Märklin lights come in five styles, all of which I used on the VECRR. These lights are works of art. They are not only scale in size with fine details and coloring, but they use “nano” LED sources that project a scale beam onto the ground. Once I saw these superb lights on a dealer's shelves, I was driven to have them adorn the VECRR. Little did I realize at the time how much of an adventure I had just purchased. As I struggled with their installation, I wondered if it was worth the time and the investment (cheap they are not).
Once I had gotten about three lights installed, I plugged them in and turned off the room lights. I had my answer...absolutely stunning! I was hooked.
What comes in the box?
Märklin lights are supplied in a transparent plastic package that makes it easy to see the type of light you are buying. The package also contains two standard plugs and the electronic base unit (resistor and surface-mount integrated circuit) to which the 12” stranded wire leads are attached. A paper insert provides pictographic installation instructions. The recommended hole for the light is 1.5 – 2mm. The depth of the hole is not indicated. NOTE: The lights I purchased were made in Slovakia.
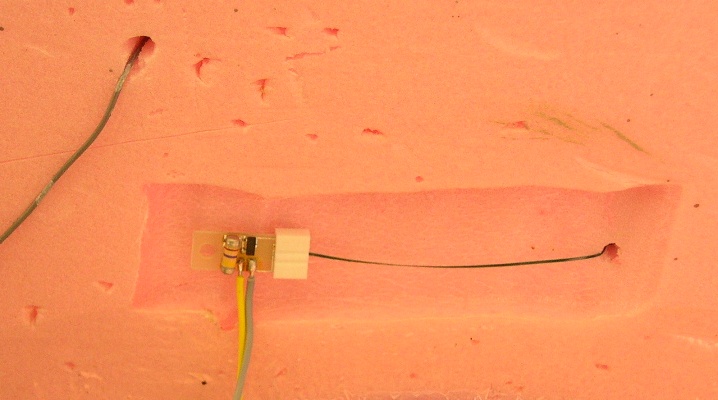
In this photo the wire and clip are shown against a piece of scrap foam.
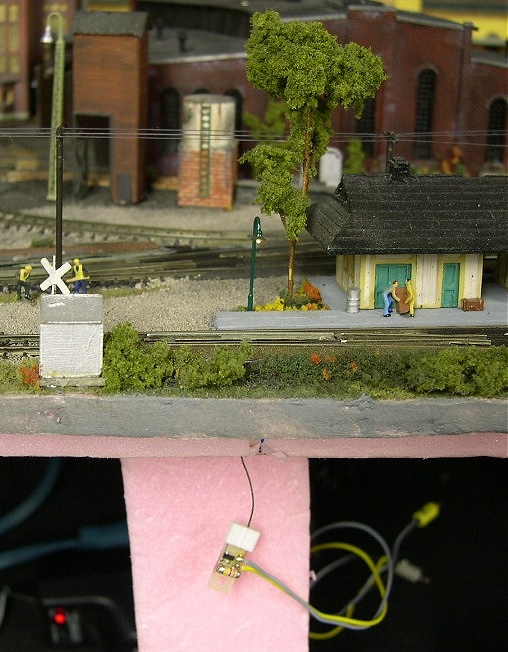
The length of the wire is long enough for a two-inch foam base. The VEC base is 1” thick. The wire is threaded through a plastic cocktail straw which makes it easy to pass the wire band through the foam base. The light base fits snuggly into the straw so that no glue is needed to hold the light in place. It is easy to position the light before affixing the electronic clip in place along the underside of the base using the prepositioned double-sided adhesive pad.
NOTE: The lights are polarity sensitive if using a DC power supply. Check to make sure that the light is working correctly. If not, switch the DC leads around.
In this photo the wire and clip are shown seated in a groove cut in the styrofoam base using a Tippi Hot Wire Foam Cutter. The clip has a piece of double-sided tape which holds it in place in the groove. I covered the entire groove with a length of clear packing tape to hold everything in place and to prevent damage.
The fragility of the Märklin lights is a major weak point of this product. The other is the unbelievably difficult task of attaching the white nylon clip that holds the metal contact strip in place over the electrical contact bands on the electronic module. The bare metal contacts must be in perfect alignment in order to made good electrical contact. It takes steady hands and immeasurable patience to succeed in getting everything into position. Even when you think you have it put together correctly, a quick plugin test with the power source can have you pulling out whatever hair you have left. On average, it took me about 3 attempts per light to get the clip into its final operational position. After the mounting hole has been made, I removed the plastic straw and carved out a trough in which to lay flat the wire and electronic clip. This operation was a piece of cake using a Tippi Hot Wire Foam Cutter with a square heating wire.
It is important to make the cut long enough to attach the clip out of harm's way. Once the contacts are securely fastened and the light is working, I pealed off the wax paper and secured the clip to the foam. I used a large piece of clear packing tape to cover the entire length of the trough. The tape holds the clip assembly in place and protects the wire from being snagged by a busy model railroader and his wayward tools.
My honest opinion about Märklin industrial lights
If it were not for the extreme beauty and scale lighting effects of the Märklin lights, I would recommend that you avoid them altogether. I do not know how one would go about installing them on a layout with a permanent base. I suppose one could build them into a removable layout section that could be handled on the work bench, but why should you have to go to such lengths. DEAR READERS: If you have a suggestion, please share it with the editor. I am sure that he will be happy to publish your techniques in the “Mailbag” section.
I was ultimately successful in installing these lights in the VEC because I could tip the layout bases up at a good angle in order to work on attaching the clips. It takes sure hands and good eyesight to line things up and to apply enough pressure on the side of the clip to make it grip securely. On more than one occasion I did not position the clip correctly and it fell off shortly afterward.
Lessons learned
- Handle Märklin lights with care, avoid any tugging or bending of the bimetal band.
- Secure the Märklin electronic clip to the underside of the baseboard and protect it from future entanglements with yourself or passing tools.
- Plan ahead to provide adequate working space in order to attach the electronic clip.
- Practice, practice, practice closing the clip on a bimetal band to get the “feel” of where to position the clip. I can assure you that you will not regret the dry runs.
- Be prepared to “lose” a light or two, especially if you have many dozens to hook up. I considered myself lucky to have ruined 2 lights out of 24. The first light I managed to get replaced by Märklin. To my embarrassment, I twitched and tugged the “tail” out of the replacement light! I conceded that this “accident” was my fault. The light now occupies a lonely spot in the back of the “Val Ease Port Authority” classification yard in “Center Val Ease”.
- It is possible to get good light coverage from the Märklin lights using a lower voltage setting than the factory-recommended 10 – 12 volts. I am very happy with the lighting effect produced using 6 volts.
- A 250 milliamp 6-volt DC wall adapter will power 10 Märklin lights wired in parallel. I used one power supply in each suitcase to power all of the DC lights.
- Do not bother with the supplied plugs. They wires need to be tinned with solder in any case for them to make good “mechanical” contact with the plug wiring socket. The screw is hard to work with. My advice: solder all connections for reliable “electrical” contact.
- Use a power distribution bar to make wiring easier. If working on a home layout, it might be more economical to wire the lighting leads to heavy-gauge trunk wires from the power source.
- As in all wiring, take the time to label power leads and document your work. A wiring diagram will make life much more enjoyable if the need arises to troubleshoot.
- 12-volt grain-of-rice bulbs can be purchased in bulk. This is by far the most cost-efficient way to buy lights.
- In order to extend the lifespan of small incandenscent bulbs, try dropping the voltage to half their rated value. I personally prefer the softer glow.
- Above all, take your time, take regular breaths and be prepared to step away from the task for a while. Keep reminding yourself of the wonderful scene that awaits you when the lights dim and the layout comes to life in the dark.
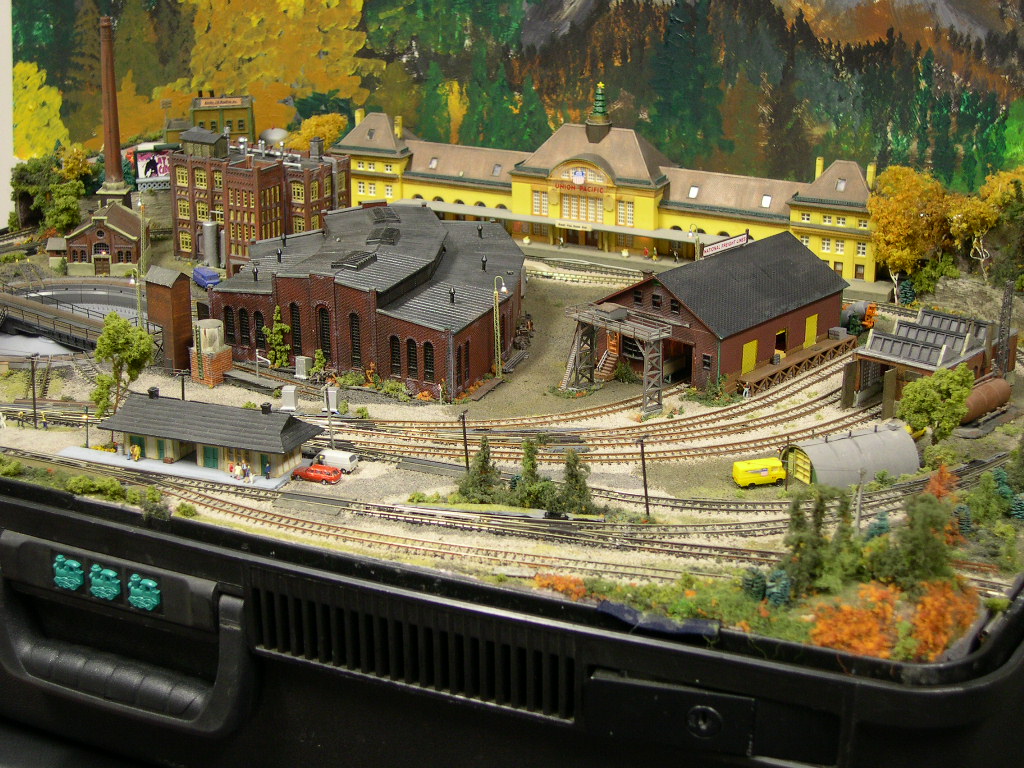
Lights on...
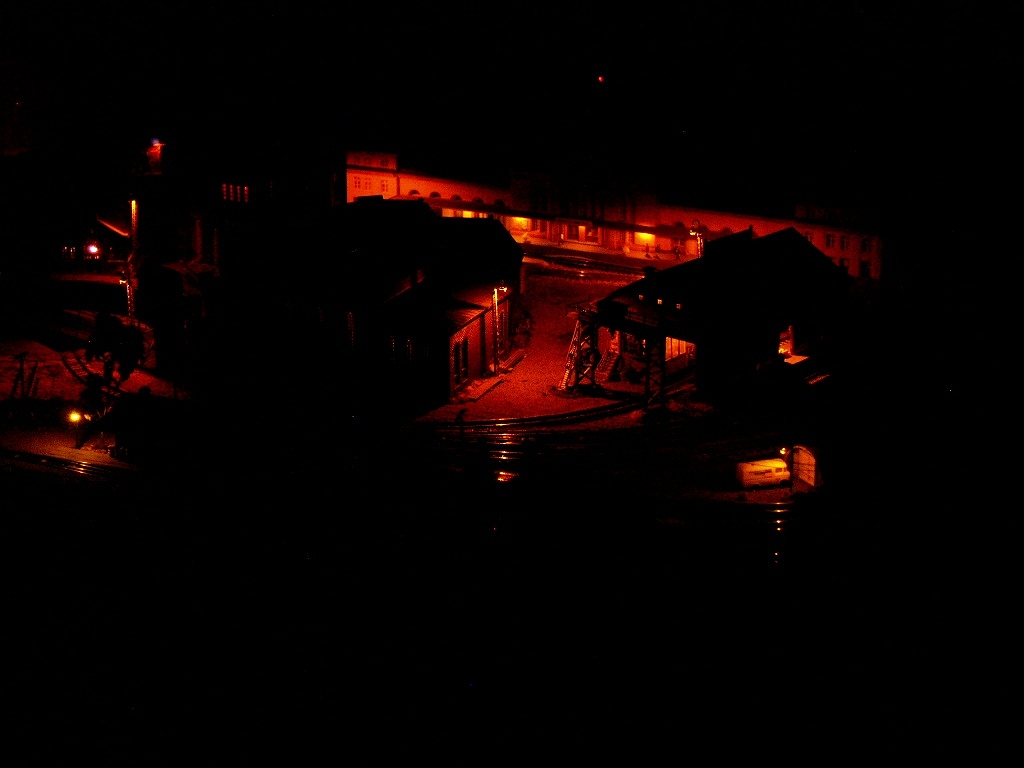
Lights off...well almost off. The effect is dramatic and exciting, at least to me! Imagine the fun to be had running trains through a nighttime landscape. There is always room for more lights but those little beauties are expensive. I did the most with the 8 Märklin streetlights I had purchased for each of the three VEC divisions, a total of 24 commercial lights. For interior lighting I used 12-volt grain-of-rice bulbs, red and yellow LEDs and 1.5-volt axial micro-bulbs.
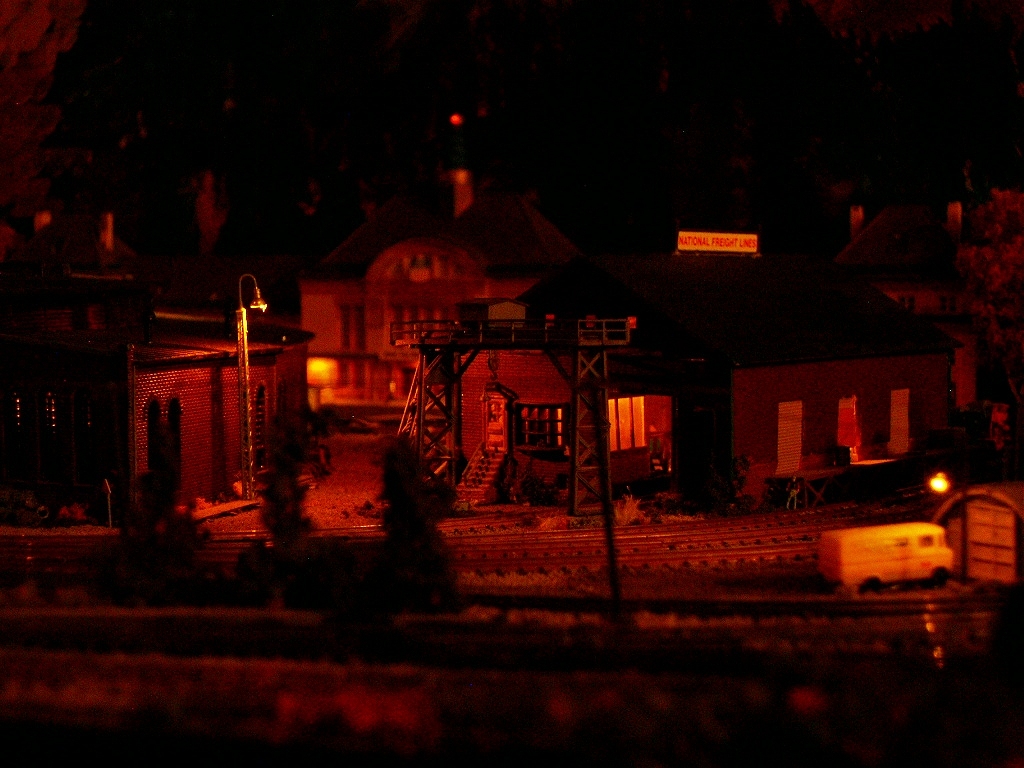
“Val Ease East” has lights almost everywhere that one would expect in a working rail yard: Märklin industrial light pole, Märklin country light pole at the MOW “Quonset” hut, 3 12-volt grain-of-rice bulbs wired in series to a 6-volt source inside the warehouse (two overhead and one inside the ceiling of the manager's office), a flashing red beacon on the Union Station Xmas tree. NOTE: someone forgot to turn on the light over the warehouse door or else the bulb needs to be changed!

Lighting effects in this “Val Ease East” scene include 4 Märklin industrial light poles, 2 Märklin curved platform lights, a Brawa electronic arc welder in the MOW shop, 3 12-volt grain-of-rice bulbs wired in series to a 6-volt DC source in the turntable roundhouse and 5 1.5-volt axial micro-bulbs wired in series to a 3-volt DC source under the station platform valance. NOTE: every structure kit has a low-voltage interior light of some sort (LED or bulb).