The Val Ease Central Railroad ©
Taking Z Scale to the Public Around the World
(Text and photos © Copyright Jeffrey MacHan)
Last Spike: Painting Acrylic Water-Color Backdrops on the VECRR, and Beyond!
On the face of it, that seems like a good idea, especially since "Val Ease Summit Division", the "substitute" section of the VECRR, does not have a backdrop. Unfortunately, after studying the original three backdrop panels, I came to the conclusion that, for two good reasons, it would be impossible to successfully paint a panel that would blend with the three original works. The first reason is that the colors of the original paintings have changed in the 3 years since they were painted. The second reason is that the original panels were heat laminated to gatorboard bases, a process that melted the acrylic paints into a reflective film. Unfortunately, the lab where I had the lamination done is 4,000 kilometers away in Vancouver, BC. Since my wife's layout needed a backdrop, I decided to take photos as I worked on a scene for her pike.
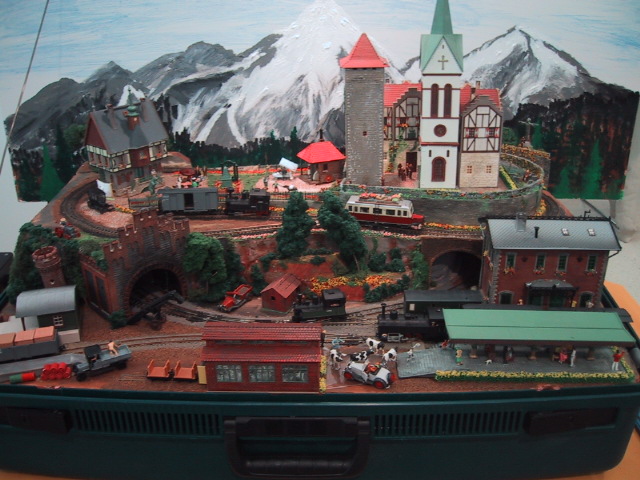
My wife, Marthe, has a beautiful suitcase-based layout in HOe scale. Hold on! Before you raise a ruckus about the scale, I must point out that there is a piece of Peco Z flex track on the layout which makes the "Kofferbahn von Sankt Bartholomä" an honorary member of the Z club. Besides, the materials and techniques I used on the KvSB backdrop are the same that contributed to the VECRR achieving "Best of Show" in judging at the 2001 NMRA National Train Show in St. Louis.
Deep Background
But before I start loading up the brush with paint, here is a little deep background on the VECRR backdrops.
The original three VECRR backdrops were the direct result of comments made to me by the judges who examined the layout for the NMRA Achievement Certificate for Scenery. I was informed, in no uncertain terms, that a hand-painted backdrop was "de rigueur" in order to qualify for the AP certificate. It didn't take me long to head to the local artists supply store and pick up four large sheets of water-color paper, several tubes of "Basic" brand acrylic paints and a medium-sized fan brush. On a long weekend, I set out to paint my backdrops. Frankly, I didn't know what to expect since I had never picked up a fan brush in my life. Oh well, nothing ventured, nothing gained!
The first step in the process was to gather several images of the Rocky Mountains from which to "copy", ahem, "draw" inspiration, so to speak. I placed the images close by and leapt into the unknown.
I did several tests of the brush and wash techniques that I recalled from watching Bob Ross, "Joy of Painting" shows on PBS.
Once I was satisfied that I was on the right "track", so to speak, I laid all three sheets on top of a layer of newspaper on the floor. I painted all three backdrops at one time, making sure that the sky highlights matched and that the horizons lined up. I observed that the sky was the key element to complete at the first painting session. Landforms could be filled in later in stages, if needed.
Once my three paintings were dry, I carefully rolled them up and headed over to a printing house where I had the paintings heat laminated onto 20" x 36" gatorboard panels. This rather unusual step provided an unexpected result. The heating process actually melted the acrylic paints and gave the surface a brilliant reflective quality. The image seems to leap off the backdrop under halogen lighting. The judges were absolutely right! A painted backdrop enhanced the visual impact of the VECRR and I'm sure contributed to my success at the 2001 NMRA National Module Competition in St. Louis, MO.
The KvSB Backdrop
Painting the backdrop for the KvSB was not as involved as for the VEC. This time round, I purchased one 36" x 36" square (obviously) foamcore section. At home, I cut it in half to give me two 18" x 36" panels for the, ultimately, two KvSB modules.
Supplies
My supply list is rather short:
- "Basic" brand acrylic water-based paints (tubes: titanium white, black, dark gray, light gray, burnt umber, dark sienna, light green, dark green and blue)
- an improvised palette on which to mix the paints (plastic margarine container lid works fine)
- a cheap 1" paint brush (for the sky)
- a medium fan brush (for trees)
- a 1/4" water color brush (for whatever)
- the bottom of a plastic margarine container (to hold the water)
- a small bottle of tap water
- a bunch of paper towels (to wipe up my mess)
NOTE: before you leap into the paints, I strongly suggest that you do some test runs to get the hang of things.
Step 1: Painting the Sky
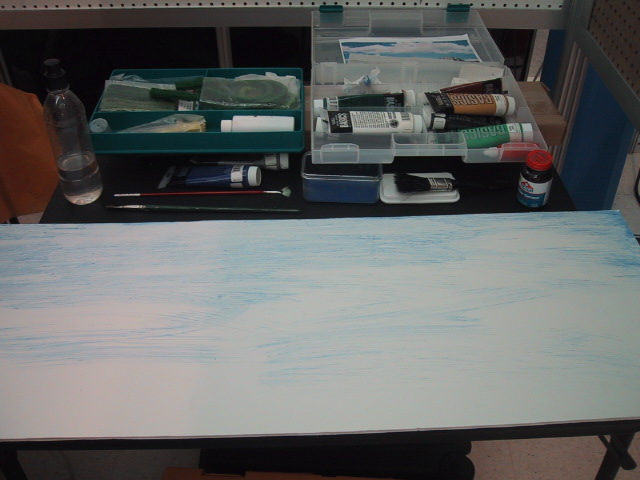
Step 1: preparing the sky
It is important to use a light wash of sky blue paint mixed into a small quantity of water using the 1" paint brush. Using wide sweeping motions, the blue wash is applied to the foamcore starting at the top of the board and progressing rapidly to the base. Since there will be mountains, it is not necessary to cover the entire sheet. Lighter areas in the sky look like light clouds so don't worry about slight gaps or uneven coverage.
Roughing in the Mountains
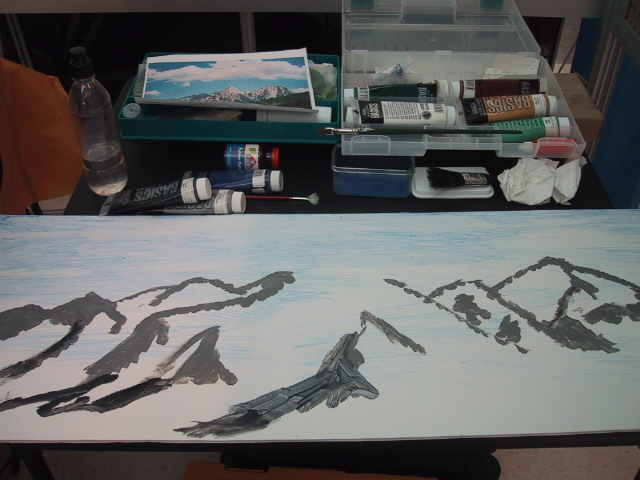
Step 2: roughing in the mountains
Notice also that closer landforms are much darker than mountains in the distance. This is where I used light gray for the distant peaks, adding dark gray to the mix as I painted over with the outlines of closer ridges, finally adding some black to the outlines of the closest rocky outcrops.
Snow Caps and Gross Details
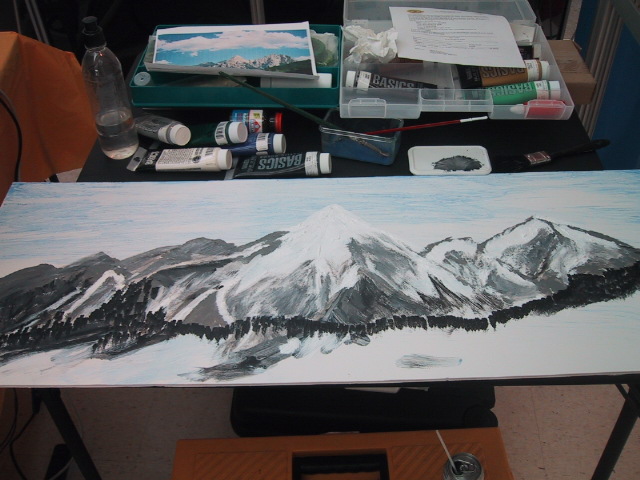
Step 3: snow capped peaks and large details
In this step I've begun to fill in some of the valleys and distant tree lines. I used the fan brush for all of this work. The trees are basically very slight vertical strokes of the brush with a slight taper, widening at the base. The tress are almost basic black at this perceived distance. All I'm looking for is to provide the illusion of conifer forests along the tree line of the mountains.
Trees and other details
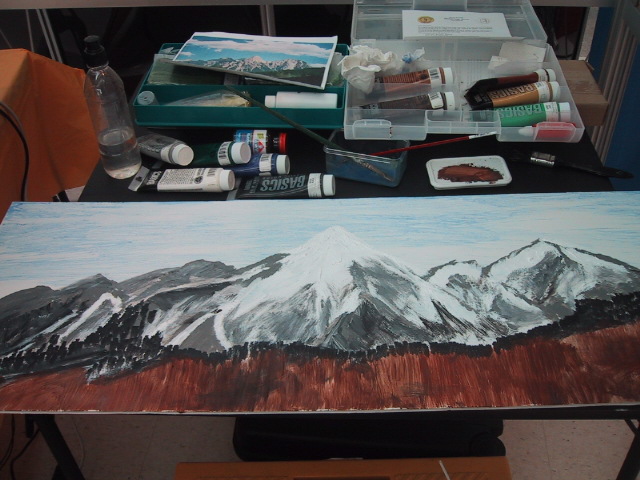
Step 4: filling in the mountains and land forms
The foreground trees will be painted over this background using a variety of colors depending on the season. In this case, I used light and dark green and the occasional dash of yellow to show some autumn colors.
The "tree-painting" technique is pure "Bob Ross". If you can get your hands on a tape of one of his lessons, go for it. His techniques are simple, straight-forward and highly effective for model railroading landscapes. The fan brush is loaded with black paint and it is used to lightly "slash" vertical tree trunks onto the panel. Then the clean fan brush is loaded with dark green and branches are added from top-to-bottom of the trunk using a stippling motion, one branch on each side of the trunk, gradually getting longer as you go down the trunk. (I can't really describe the technique adequately. Do some tests and you'll probably figure it out).
Note: try not to be too uniform in your tree line. Heights vary and your trees will also be growing on different heights of rock outcroppings.
Putting It All Together
Step 5: the finished backdrop