The Val Ease Central Railroad ©
Taking Z Scale to the Public Around the World
(Text and photos © Copyright Jeffrey MacHan)
Lightweight Layout Techniques Used on the Val Ease Central ©, Part 4: Budget Forests
There are several advantages to my home made trees. It doesn't take much skill to make them, they are cheap to make, they can be made in the sizes and shapes and colors that strikes your fancy, it doesn't take long to make one so making forests of them is a reasonable proposition, especially if you can recruit one or several younger members of the family to chip in.
I have demonstrated my technique for several years now at train shows and meets around the country. As part of my 'show' I invite the audience to 'build' a tree as a keepsake. So far the youngest train fan that has successfully produced a tree was three years old! How hard can it be?
Here is the list of supplies:
- rubber cement,
- plain round wood toothpicks, cocktail toothpicks can be used for Douglas firs and redwoods,
- dark brown chisel tipped marker pen,
- emery board or rough sandpaper,
- Woodland Scenics foliage in your favorite colors (if you plan to produce a forest, after reading this article, purchase several bags of the predominant color and one each of the highlight colors which can be a different shade of green and autumn foliage),
- Snub nosed hobby scissors,
- a slab of styrofoam to temporarily plant your trees as you make them.
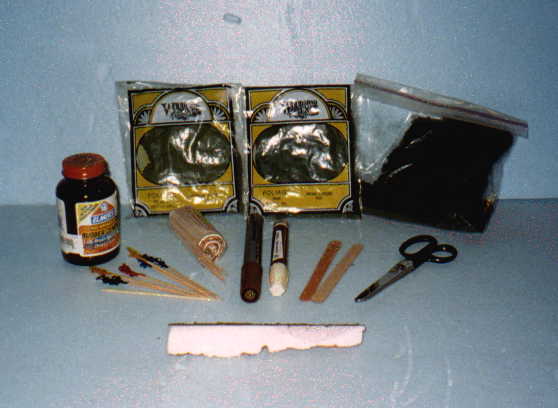
A snapshot of our tree-making supplies.
Note: The foliage material that we work with in this project generates quite a bit of leftover material which I suggest that you collect if you can. It is very useful for other landscaping projects like ground cover and ivy. I like to work with the foliage over a container such as a cookie sheet that has sides or any other suitable container that makes collection easy.
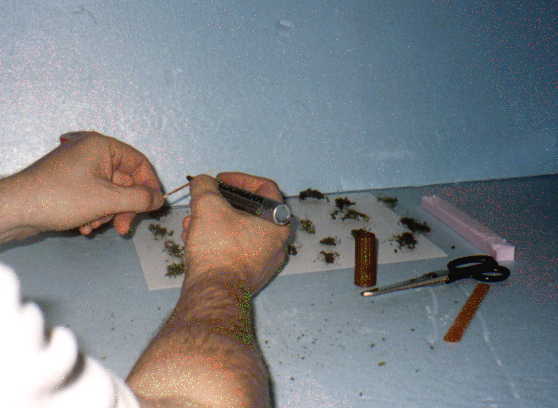
Place a sheet of plain white paper or spread some newspaper over your work area. Don't use kitchen paper towels. We will lay out the 'branches' on the paper for easy pick up later.
Remove the foliage material from the bag and unfold it over the collection vessel. See what I mean about droppings? Our objective is to tear off little pieces of this material and place them on the white paper. These pieces will be branches so try to pull off pieces that are about the length that your future tree is expected to have. It's good to have a variety of sizes so that you can pick the length that you need. Hint: pinch the material firmly between your fingers so that the foliage material comes along with the fiber webbing.
Tear off about ten pieces of material to begin with. Don't worry about the threads, we'll deal with them later. Keep the pieces apart since the threads tend to grab neighboring pieces and it will be easier to pick just one and not a string of them.
Now we've got branches.
Preparing the tree trunk
Pick up a toothpick at one end between your thumb and index finger. This end will be the root end of the trunk.
Take the emery board and run it down the length of the trunk to roughen the surface. Turn the toothpick in your fingers and scratch the wood in long strokes. Don't saw it unless you absolutely want to, of course! I like to think that this step scratches the wood surface and helps create a 'bark' effect in the next step. Note: you can drop this step for time sake if you are making a forest and for background trees. I keep doing it because I'm a creature of habit.
Next, take the marker pen and apply ink to the trunk in long strokes down the length of the trunk starting at your thumb nail. Turn the trunk slightly in your fingers after each stroke and continue until the surface is covered (except the tip that you are holding).
The fun part of the project is adding foliage and gluing on the branches.
Hint: read through this section completely before you begin since the glue tends to dry while we stumble through the instructions!
Using the brush in the lid of the rubber cement, apply a medium coat of cement along the trunk. Whoa, that's way too much! You don't want it to drip but you want enough to stay sticky for the time it takes to 'grow' branches on the tree. However, make sure that you have enough cement at the tip of the trunk to glue on the 'crown'.
Now take some of the loose foliage material which you have collected while tearing off the branches, and sprinkle it onto the toothpick immediately after you have applied the rubber cement. This helps to fill in the trunk and gives the trees more depth. I have found that it also reduces the amount of foliage branches that are needed to give a filled out look to the tree.
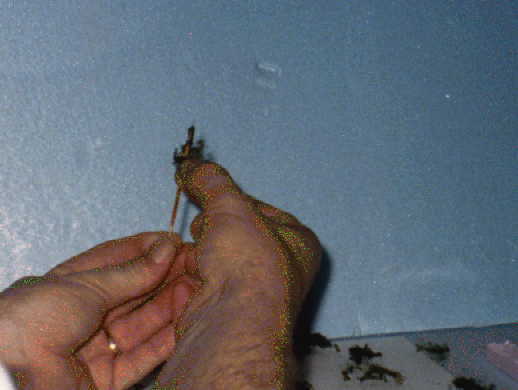
Add branches in a spiral order starting at the top.
Before you start to add branches, it is time to embellish the trunk with a dusting of foliage droppings collected while tearing the branch material from the sheet. quickly, while the rubber cement is very wet, sprinkle some foliage dust onto the trunk while holding it horizontally over the collection area and turning slowly. You'll notice that foliage grabs the tree trunk. This will help fill in the undercoat of the trunk and enhance the look of the finished tree.
Next, pick a smallish piece of 'branch' from the paper roll about half its length betweeen your fingers to make a sharp point. The tip of this special first branch is the crown of the tree. Now attach (pinching is a good description of the technique) the crown to the tip of the trunk, covering the tip of the toothpick. The crown should extend past the point.
Now, holding the trunk upright in front of you (your thumbnail is facing you, right?), with your other thumb and index finger pick up a short branch from the paper. The objective is to lightly touch the branch horizontally to the glue just under the crown, and release. Hint: the thumbnail of the tree hand is facing you, the thumbnail of the foliage hand is facing either up or down but not you. This will keep the plane of the foliage horizontal while the tree trunk is vertical.
OK, now touch the foliage to the trunk just below the crown. If the glue hasn't already dried from all this explaining, the branch will stick, even if only by a few threads.
Turn the trunk a half way round in your finger tips, pick up a similar length branch from the paper and glue it opposite the first branch just under the crown.
Rotate the tree, pick up a branch and touch it just under and between the first row of branches. Continue with another branch on the opposite side from the last one. As you go down the trunk, pick slightly longer branches. Depending on the height and type of tree that you are modeling, four or five rows of branches should be enough.
Since you ultimately want your children or grand children to make trees for you, use child friendly tools such as the emery board and the snub nosed hobby scissors.
Now for a little trim. Hold the tree up in front of you at eye level so that you can use those cute little scissors to trim the hair sprouting out from your tree. Snip, turn, snip, turn, snip and there you have it, your first tree!
Holding the tree by the crown this time, stick it in the slab of styrofoam for later transplanting to your layout.
Few of your early efforts will likely be worthy of foreground planting. This is really not important since every tree that you make will have a place on your layout. Hey, we're making a forest here! Just put the really ugly trees in the back and put the knock-outs up front to be admired by your spouse or at least your cat.
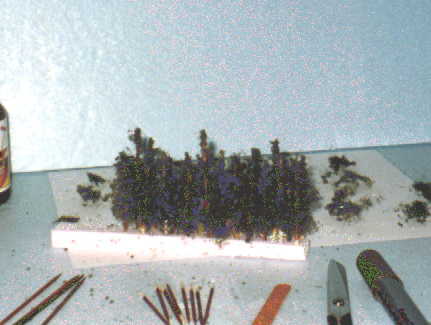
The beginnings of a small forest.
You will soon be churning out these trees and you will certainly start experimenting with this technique. Don't forget the highlight colors that I suggested in the list of supplies. Some of your trees will have dry, discolored branches and some trees will be dead, period. This is where the fall foliage colors come in handy. Don't be shy. If you don't like the result, plant the tree way in the back.
Use the lighter shade of green to represent younger, new growth at the crown of the trees or as short saplings. Different species will also be different colors of green.
Planting is fun. You can leave clearings, have wind broken trees or leaners. Groups of trees may be diseased or damaged. Hint: when densely planting trees on a hillside, you can use less material in the back and lower parts of the tree where they will not be seen.